
How to Choose and Complete a Portrait Photography Course That Transforms Your Skills
Choosing the right portrait photography course means matching your skill level and learning style to a program that offers structured curriculum, hands-on practice, and expert feedback. Whether you’re drawn to the flexibility of online learning or the immersive experience of in-person workshops, selecting a quality course will accelerate your progress from awkward poses and flat lighting to confident, compelling portraits that capture personality and emotion.
The portrait photography landscape has evolved dramatically. Gone are the days when aspiring photographers needed to apprentice in studios for years before mastering the craft. Today’s courses blend technical fundamentals with creative vision, teaching everything from camera settings and lighting setups to directing subjects and post-processing workflows. But this abundance of options creates its own challenge: how do you distinguish between a comprehensive program and a superficial overview?
I’ve watched countless students transform their work through the right instruction. The difference between someone who reads tutorials online and someone who completes a structured course shows immediately in their portfolios. Formal training provides accountability, systematic skill-building, and the kind of detailed critique that turns good images into exceptional ones.
In Canada, options range from fully online programs starting at $35 per week to hands-on workshops in cities like Toronto, Vancouver, Calgary, and Ottawa. The Canadian Photography School offers 24/7 access to online materials taught by experienced instructors, while location-based courses provide direct feedback in small-group settings at carefully chosen shooting locations. Your choice depends on your schedule, budget, preferred learning environment, and specific portrait goals, whether that’s newborn photography, environmental portraits, or studio headshots.
This guide breaks down exactly how to evaluate and select a portrait photography course that matches your needs, then complete it successfully to build a portfolio you’re proud to share.
What You’ll Need Before You Start
The good news? You don’t need thousands of dollars in equipment to start learning portrait photography. Most courses are designed for enthusiasts at all levels, and you likely already own much of what you’ll need. The key is having the basics in place so you can focus on learning techniques rather than scrambling for gear mid-lesson.
Here’s what you’ll want to have ready before your first session:
- A camera with manual controls, DSLR, mirrorless, or an advanced smartphone with portrait mode and manual settings
- Basic understanding of your camera’s exposure triangle: aperture, shutter speed, and ISO
- A notebook or digital note-taking app to track techniques, settings, and instructor feedback
- Stable internet connection if you’re enrolling in an online course with video lessons
- At least one willing practice subject, a patient friend or family member makes learning easier
- Curiosity and willingness to experiment, because portrait photography improves fastest through real-world practice
If you’re working with a smartphone, don’t feel like you need to upgrade immediately. Many foundational portrait skills, composition, lighting awareness, subject direction, apply regardless of your gear. A newer iPhone or Android with portrait capabilities will let you grasp the concepts, and you can always invest in dedicated equipment later as your skills and commitment grow.
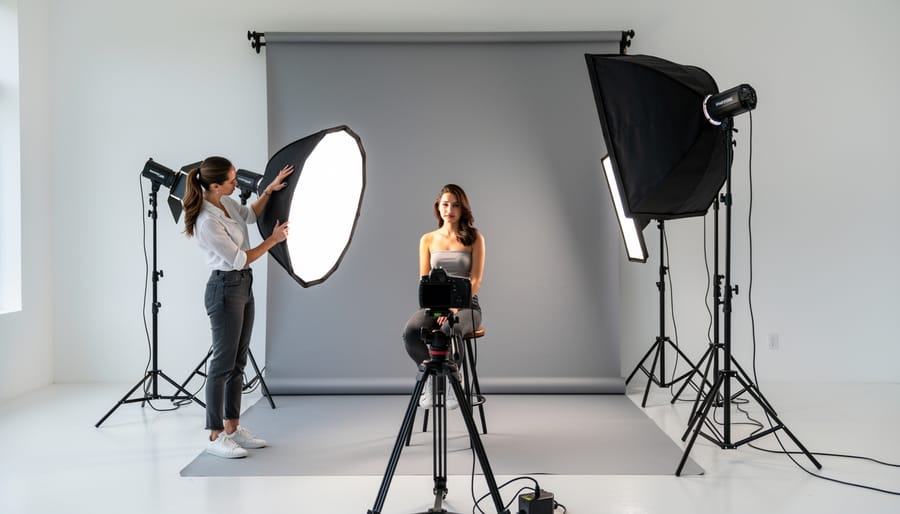
For online courses starting at $35 per week, the financial barrier stays low while you’re testing the waters. If you’re leaning toward hands-on workshops in cities like Toronto, Vancouver, or Ottawa, check whether the venue provides studio lighting for practice or if you’ll need your own reflector. Most small-class formats supply shared equipment, but knowing ahead of time removes uncertainty.
The real prerequisite isn’t expensive lenses or a professional setup. It’s showing up ready to learn, willing to make mistakes, and committed to practicing between lessons. Portrait photography rewards those who engage with real people, not just theory.
Important Considerations Before Enrolling

Before you hand over your credit card or block out your calendar, let’s talk about the practical realities of enrolling in a portrait photography course. These considerations aren’t meant to discourage you, but they’ll help you choose a course you’ll actually complete and benefit from.
First, be honest about your budget. While online courses can start as low as $35 per week with flexible payment options, costs add up over time. Factor in not just the course fee itself, but ongoing expenses like practice materials, props, backgrounds, or additional lighting equipment you might want as you progress. Hands-on workshops in cities like Toronto, Calgary, or Vancouver typically cost more upfront, though they condense learning into intensive sessions. Whatever you choose, make sure the payment structure fits comfortably into your monthly budget without creating financial stress.
Time commitment deserves serious thought too. A course with 24/7 access to materials sounds flexible, and it is, but you still need to carve out regular hours for studying and, crucially, for practice beyond the coursework. Expect to spend at least twice as much time practicing with real subjects as you do watching lessons or reading materials. Portrait photography isn’t something you learn by passive consumption. You need willing friends, family members, or patient strangers to pose for you, often repeatedly as you refine techniques.
Managing your expectations protects your motivation. You won’t nail perfect lighting or natural poses in your first session, and that’s completely normal. Progress in portrait photography comes in stages, with frustrating plateaus between breakthroughs. The best courses are taught by passionate and experienced tutors who understand this learning curve, but no instructor can shortcut the hours of practice required.
Finally, verify credentials before enrolling. Research the school’s reputation, read reviews from past students, and check that instructors have actual professional portrait experience, not just teaching credentials. Canada’s premier photography schools openly showcase their instructors’ work and backgrounds, so if a course is vague about who’s teaching or their qualifications, that’s a red flag worth investigating.
Your Step-by-Step Path to Portrait Photography Mastery
Step 1: Decide Between Online and Hands-On Learning
Your first big decision shapes everything else about your learning experience: do you want the flexibility of studying on your own schedule, or the energy of learning alongside other photographers in a real studio setting?
Online portrait photography courses give you complete control over when and where you learn. You can review lighting techniques at midnight, practice posing exercises during lunch breaks, or pause a lesson when you need to grab your camera and test something immediately. Canadian Photography School’s online Portrait Photography Course offers 24/7 access to all course materials, so you’re never waiting for the next class session to move forward. This format works beautifully if you travel frequently, work irregular hours, or simply prefer absorbing information at your own pace. The cost makes online learning even more appealing. With flexible payment options and courses starting as low as $35 per week, you can invest in serious portrait training without a massive upfront commitment. You’ll still learn from passionate and experienced tutors who guide you through assignments and provide feedback on your submitted work.
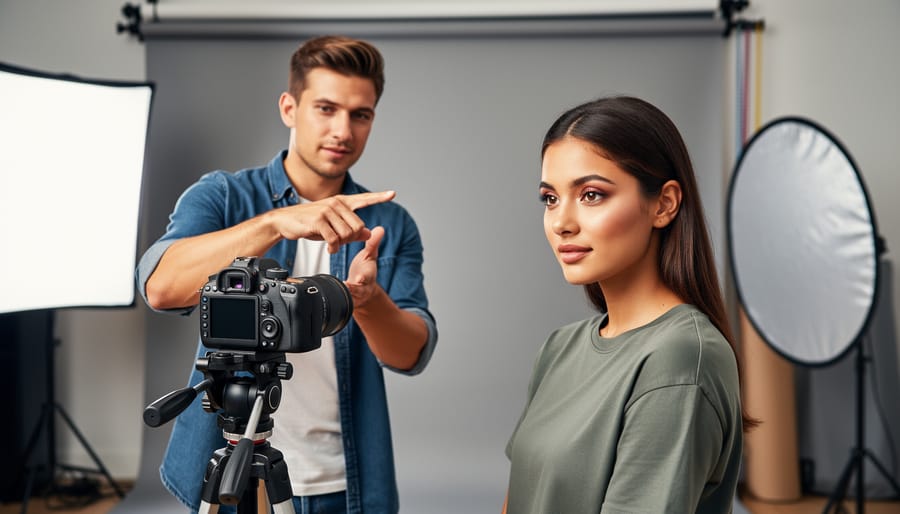
Hands-on workshops, by contrast, put you in a room with professional lighting equipment, live models, and an instructor who can adjust your camera settings or reposition your subject in real time. When you’re struggling to balance ambient light with fill flash, someone’s there to show you immediately rather than waiting for email feedback. These courses create natural networking opportunities. The photographer standing next to you might become a collaborator on future projects, or you’ll exchange tips about local portrait clients neither of you would have discovered alone. While some studies suggest in-person learning is preferred for building confidence with technical skills, the trade-off is scheduling around specific dates and locations.
Canadian Photography School runs hands-on portrait photography courses in Calgary, Edmonton, Toronto, GTA, Ottawa, Kelowna and Vancouver, using small classes in outstanding locations where you get meaningful one-on-one attention. If you live near one of these cities and can commit to a fixed schedule, the immediacy of hands-on practice accelerates your learning curve. If not, online training still delivers comprehensive portrait skills you can practice with friends as models until everything clicks.
Step 2: Evaluate the Curriculum for Portrait-Specific Skills

A well-designed portrait photography course should take you beyond general camera skills and dive into the specific techniques that separate a casual snapshot from a compelling portrait. When you’re reviewing course descriptions, look for curriculum details that confirm you’ll learn the portrait-specific fundamentals, not just generic photography theory.
Start by checking whether the course covers both natural light and studio lighting for portraits. Natural light instruction should teach you how to read ambient light, work with window light, and handle challenging outdoor conditions, yes, even outdoor cold weather portraits when the light is gorgeous but your subject is freezing. Studio lighting modules should explain modifier choices (softboxes, umbrellas, reflectors), ratios, and how to create different moods with controlled light setups. If a course description just mentions “lighting basics” without the portrait context, that’s a red flag.
Next, scan for posing and directing techniques. A quality curriculum will teach you how to position hands, angles that flatter different face shapes, and full-body posing for environmental portraits. Equally important: look for content on directing subjects and building rapport, because technical skills mean nothing if your subject looks stiff and uncomfortable. I’ve learned this the hard way while photographing strangers during my travels, connection makes the portrait.
The best portrait courses explicitly cover these essential elements:
- Composition rules specific to portraits, including framing, negative space, and eye placement
- Post-processing workflows tailored to skin retouching, color grading, and portrait enhancement
- Different portrait genres, headshots, environmental portraits, family groups, and lifestyle sessions
- Client communication and setting expectations for commissioned portrait work
Finally, watch for curriculum depth markers. Does the course dedicate separate modules to each portrait type, or does it lump everything into a single “portraits” lesson? Detailed syllabi with specific learning outcomes per module signal a thoughtfully designed course. Vague descriptions like “learn to take better portraits” won’t get you the targeted skills you need to actually transform your work.
Step 3: Verify Your Instructor’s Portrait Expertise
Your instructor shapes your entire learning experience, so it’s worth doing your homework before you commit. I learned this the hard way early in my photography journey, a course led by someone with impressive credentials but zero teaching ability left me more confused than when I started.
Start by examining the instructor’s portrait portfolio. Look for consistency in their work, evidence of technical mastery with lighting and posing, and a distinct style that demonstrates artistic vision beyond just technical competence. A professional portrait photographer should have a body of work that shows they’ve solved real-world challenges, difficult lighting situations, diverse subjects, various portrait contexts from headshots to environmental work.
Canadian Photography School, for instance, uses passionate and experienced tutors who bring both technical expertise and teaching skill to their online Portrait Photography Course. This combination matters more than credentials alone. An award-winning photographer who can’t explain their process clearly won’t help you grow.
Dig into their teaching background next. How long have they been instructing? Do they have testimonials from past students? Can you find examples of student work that shows measurable improvement? Teaching portrait photography requires different skills than shooting portraits, patience, the ability to break down complex concepts, and experience troubleshooting common beginner mistakes.
Ask direct questions before enrolling: What’s your primary area of portrait expertise? How do you structure feedback? What’s your teaching philosophy? A confident, experienced instructor will answer these readily and specifically. If course providers are vague about instructor backgrounds or hide behind generic “expert team” language, that’s a red flag.
Remember, you’re not just buying access to information, you’re investing in mentorship that should accelerate your growth beyond what you could achieve alone.
Step 4: Review Pricing and Payment Flexibility
Understanding course costs upfront saves you from nasty surprises down the road. Portrait photography courses range dramatically in price, from free YouTube tutorials (which lack structure and personalized feedback) to multi-thousand-dollar intensive workshops. Your job is to figure out what you’re actually getting for your money.
Start by looking at the total cost versus what’s included. Does the price cover just video lessons, or does it include instructor feedback, downloadable resources, community access, and ongoing support? Canadian Photography School offers flexible payment options with online courses starting at $35 per week, making quality training accessible without a huge upfront commitment. Compare that payment structure to courses demanding full payment before you’ve even previewed the material.
Watch for hidden costs that inflate your budget. Some courses charge separately for certificates, advanced modules, or critique sessions that should be part of the core package. Others require specific software subscriptions or equipment upgrades you hadn’t planned for. Read the fine print about what happens if you need to pause or cancel, rigid refund policies are a red flag.
Budget beyond the course fee itself. You’ll need to invest in practice materials: props for styling portraits, reflectors or basic lighting modifiers, and possibly studio rental time if you’re working on commercial portrait skills. If you’re based in Toronto and thinking about eventually offering portrait services, understanding portrait pricing in Toronto helps you calculate a realistic return on your educational investment.
The best value isn’t always the cheapest option, it’s the course that matches your goals, fits your budget comfortably, and delivers the specific portrait skills you came to learn.
Step 5: Match the Course to Your Schedule and Location
Choosing a course that fits your real life is just as important as finding the right curriculum. I learned this the hard way when I once signed up for a workshop that required three consecutive weekends of travel, my excitement quickly turned to exhaustion and resentment toward something I’d been looking forward to.
For online courses, check whether live sessions are required and what time zone they follow. A course hosted in Eastern Time might mean logging in at odd hours if you’re on the West Coast. Self-paced modules offer complete flexibility, letting you learn at 6 AM before work or 10 PM after the kids are asleep. The 24/7 access model works beautifully for people with unpredictable schedules or those who want to revisit tricky concepts like rim lighting multiple times.
Hands-on courses demand more logistical planning but deliver irreplaceable value. If you’re considering Canadian Photography School’s hands-on Portrait Photography Course, you’ll find options in Calgary, Edmonton, Toronto, GTA, Ottawa, Kelowna, and Vancouver. Small classes in outstanding locations mean you might practice waterfall portrait locations or capture Calgary Stampede portraits in dynamic, real-world settings that challenge and inspire.
Consider travel costs and time off work when evaluating hands-on workshops. A weekend intensive three hours from home might cost less overall than a week-long course in your own city once you factor in commuting time. The small-class advantage means personalized feedback you simply cannot get in a 50-person webinar, making the logistical effort worthwhile for many learners.
Step 6: Enroll and Prepare for Your First Session
Once you’ve chosen the right course, enrolling is usually straightforward, most providers offer online registration with flexible payment options starting as low as $35 per week. After you submit your payment, you’ll typically receive login credentials within 24 hours for online courses, or confirmation details for hands-on workshops. That confirmation email is your gateway, so save it somewhere you’ll remember.
The real work begins in the window between enrollment and your first session. Use this time to set yourself up properly:
- Create a dedicated folder on your computer or cloud storage for course materials, organized by module or week
- Clear 60-90 minutes in your calendar for your first lesson, plus another 30 minutes immediately after to review and take notes
- Charge your camera batteries, format your memory cards, and confirm all your gear is working
- Identify two or three willing portrait subjects, friends, family members, or roommates who’ll let you practice without pressure
- Set up a simple practice area with decent natural light, ideally near a large window with indirect sunlight
During your first week, expect to feel slightly overwhelmed by new terminology and techniques. That’s completely normal. Online courses with 24/7 access let you pause, rewind, and rewatch sections until concepts click. For hands-on workshops in cities like Toronto or Vancouver, you’ll benefit from immediate instructor feedback, but the pace moves faster, take photos of demonstration setups and jot quick notes between exercises.
Block out practice time right after each lesson while the techniques are fresh. Thirty minutes of shooting portraits with your practice subjects twice a week will cement your learning far better than cramming everything into one marathon session. Your friends might roll their eyes at first, but most people secretly enjoy being photographed once they see you’re genuinely improving.
How to Know Your Course Is Working
The clearest sign your portrait photography course is working shows up in your images. Compare your recent portraits to ones you shot before the course, you’ll notice sharper focus on the eyes, more intentional use of light, and subjects who look genuinely comfortable rather than stiffly posed. When family members start asking you to take their headshots, or friends request you photograph their kids, that’s real-world validation your skills have leveled up.
Feedback becomes more specific as you progress. Instead of generic “nice photo” comments, you’ll hear people mention how the lighting flatters them or how natural they felt during the session. Your instructor’s critiques will shift from foundational issues like exposure problems to nuanced suggestions about composition choices and creative direction. When you can look at a portrait and immediately identify what you’d adjust next time, maybe the catchlight placement or the background separation, you’re thinking like a portrait photographer, not just following formulas.
Portfolio growth marks another milestone. You should accumulate 15-20 strong portraits across different lighting scenarios and subject types by the end of your course. If you’re only producing one or two usable images per practice session, you might need to slow down and revisit specific modules rather than rushing ahead.
After completing your course, continuing education keeps momentum alive. Many Canadian Photography School students move into specialized workshops focusing on newborn photography, editorial portraits, or studio lighting mastery. If you’re drawn to cultural storytelling like I am, portrait techniques transform travel photography, suddenly you’re capturing genuine connections with locals instead of just landscapes. Events like TIFF portrait inspiration offer opportunities to study how professional photographers work with celebrities and create compelling headshots under pressure.
Some graduates build portrait photography into a freelance business, starting with headshots for LinkedIn profiles at $150-200 per session. Others simply enjoy having the skills to document their family’s milestones beautifully. Either path validates the investment you made in learning.
Common Questions About Portrait Photography Courses
How long does it take to complete a portrait photography course?
Most online portrait photography courses take 8 to 12 weeks to complete if you follow the recommended pace, though self-paced options with 24/7 access let you finish faster or slower based on your schedule. Hands-on workshops typically run over a weekend or span several weeks with weekly sessions, giving you concentrated practice time.
Do I need professional equipment to start?
You don’t need top-tier professional gear to begin learning portrait photography. A DSLR or mirrorless camera with manual settings is ideal, but many courses teach fundamental concepts like composition, lighting, and posing that apply regardless of your equipment level. Focus on understanding the techniques first, then upgrade your kit as your skills and budget grow.
Can I take a course if I only shoot with my phone?
Yes, though you’ll get more from portrait-specific training if you can control manual settings like aperture and shutter speed. Many foundational concepts, composition rules, directing subjects, understanding light quality, translate directly to smartphone photography. If you’re serious about portraits, consider borrowing or renting a camera with manual controls to practice alongside course lessons.
What’s the difference between general photography and portrait-specific training?
General photography courses cover landscapes, street photography, product shots, and other genres broadly, while portrait-specific training dives deep into working with people. You’ll learn specialized skills like posing techniques, how to make subjects comfortable, managing studio and natural lighting for skin tones, and post-processing workflows tailored to human faces. The depth of people-focused instruction makes portrait courses worthwhile even for experienced general photographers.
Are online courses as effective as in-person workshops?
Both formats work well, but they serve different learning styles. Online courses offer flexibility, 24/7 access to materials, and lower costs starting at $35 per week, making them perfect for self-motivated learners who can practice independently. Hands-on workshops in cities like Toronto, Vancouver, Calgary, Edmonton, Ottawa, Kelowna, and GTA provide immediate feedback, networking with other photographers, and real-world practice in outstanding locations with small class sizes, ideal if you thrive with direct instructor interaction.
Will I be able to charge for portrait sessions after completing a course?
Completing a portrait photography course gives you the technical foundation and confidence to start accepting paid work, but building a client base takes time and a strong portfolio. Start by photographing friends and family to build your collection of work, then gradually take on paying clients as your skills and reputation grow. Many photographers begin with side projects alongside their day jobs before transitioning to full-time portrait work.
These questions come up constantly when people consider enrolling in portrait photography training, and the answers reveal an important truth: there’s no single perfect path. I’ve watched photographer friends transform their skills through dedicated online study, while others needed the energy and accountability of weekend workshops to stay motivated. What matters most is matching the format to how you actually learn and practice, not chasing an idealized version of the perfect student you think you should be.
The equipment question deserves extra attention because it stops too many beginners before they start. I shot portraits with a basic entry-level DSLR for years before upgrading, and some of my favorite images from that period came from truly understanding light and connection rather than relying on expensive glass. Your camera matters less than your willingness to experiment, fail, and try again with real human subjects who’ll give you honest feedback. Start where you are, and let the course teach you what gear investments will actually serve your growth rather than just your gear-lust wish list.
I’ll never forget the moment portrait photography clicked for me. I was photographing a street vendor in Montreal’s Old Port, trying to capture the city’s culture for a travel piece. My usual wide-angle approach felt flat, distant. Then I remembered a simple portrait technique I’d just learned, moving in closer, watching the light on his face, asking a question that made him smile genuinely. That single frame told more about Montreal’s warmth and character than a dozen scenic shots ever could.
That’s what portrait skills do. They transform how you see people, whether you’re documenting your travels, capturing family moments, or simply wanting to create images that connect. The techniques you learn, understanding light, putting subjects at ease, composing with intention, ripple through every type of photography you’ll ever do.
The best part? Learning portrait photography in 2026 has never been more accessible. With online courses starting at $35 a week and hands-on workshops across Canada, you don’t need fancy credentials or expensive equipment to start. You just need curiosity and a willingness to practice.
So pick a course that fits your schedule and learning style, grab your camera, and ask someone to be your subject. The portraits you’ll create six months from now will surprise you. More importantly, you’ll see the world, and the people in it, with completely new eyes.